DIY Harness for Ferrets
Even though ferrets are mostly kept indoors, it is not unusual to want to take them outside for travel or just for a simple walk. If you want to take your ferrets out and show them off without risking losing any of them, you will need to use a leash.
With their sneaky nature, it is quite possible that they will wander away if you let them loose in the outdoors without a leash. And while collars look adorable on them as little accessories, they’re not the best for using with leashes. So, to avoid any accidental injuries or possible escape, it is always recommended to use a harness with the leash.
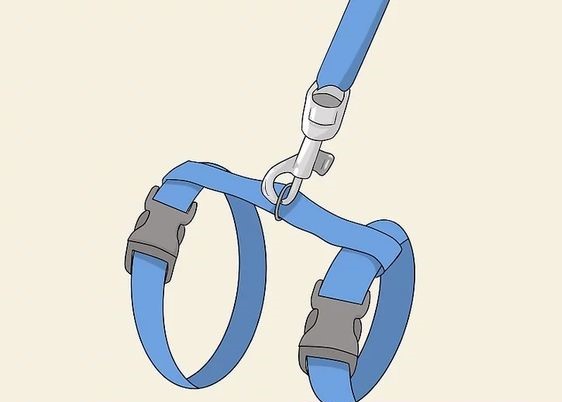
Since the harness needs to fit your ferret snugly, it might be difficult to find one that is perfect for your pet. But no need to worry, you can make this DIY “H” style harness to any size you need.
So are you ready to make your own harness for ferrets? Let’s get into it.
Materials you will need:
- Webbing
- Buckles
- Measuring tape
- Webbing slider
- D-ring
- Needle and thread or a sewing machine
Step 1:
Use the measuring tape to measure the width around the neck and the waist of your ferret. When measuring the waist, make sure you are not going too far into the soft stomach area, and measure just behind their front legs.
Step 2:
Cut the webbing into two separate strips, each a couple of inches longer than the length around the neck and waist accordingly.
Step 3:
Take one of the strips and pass one edge through the loop of the buckle and sew it in place onto itself.
Step 4:
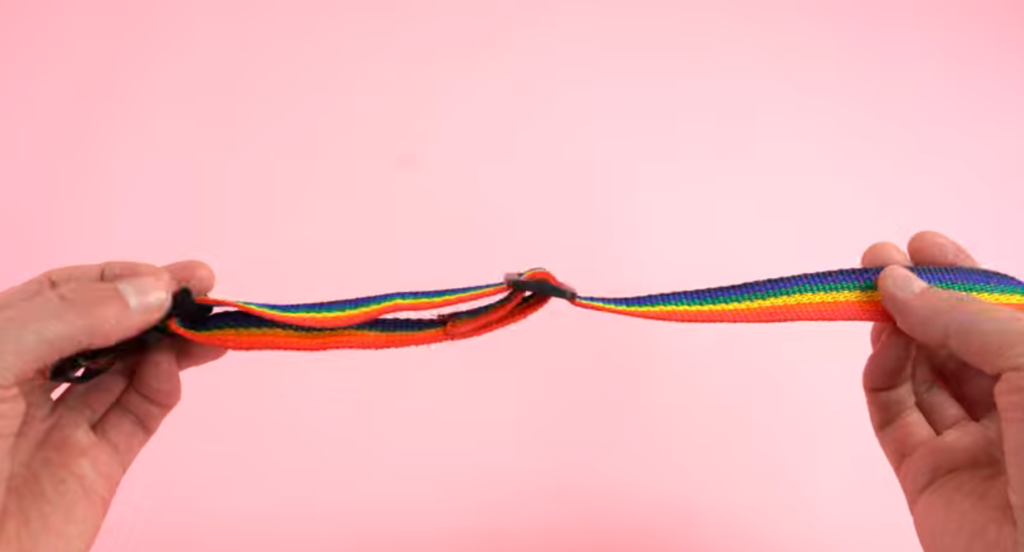
Thread the webbing slider through the other edge of the webbing and then add another buckle through the same edge. Feed the edge of the webbing back through the slider again, but this time from back to front, and hold it in place.
Step 5:
Sew the edge onto itself, making sure the webbing is looped through both the slider and the buckle.

Step 6:
Repeat steps 3 to 5 with the other strip of webbing as well.
Step 7:
The larger loop will be for the waist and the smaller one for the neck. Tie them snugly around the ferret on these specific parts.
Step 8:
Measure the length between the two loops, along the spine of your ferret.
Step 9:
Cut another strip of the webbing that is a couple of inches longer than the length measured in the previous step.
Step 10:
Wrap each of the edges of this strip around each of the loops, making sure that the distance you measured previously is maintained in between the loops.
Step 11:
Pass a d-ring through this string and sew it in position around the two loops.

Now, the harness is ready to be worn! Wake your ferrets up and drag them out of their DIY hammocks 🙂
Now that you know how to make a harness for ferrets you are able to make one for each of your fuzzy friends. Keep in mind that it is better to take the measurements of all of them and making multiple harnesses, instead of making one harness to fit them all.
To properly wear the harness, buckle the loops around the neck and waist of your pet and then adjust the slider to secure it in place. Make sure the harness is neither too loose, nor too tight, to prevent any accidental injuries or just to prevent them from sliding away. For best fit, make sure you can fit two of your fingers through the loops after you have fastened it on the body.

To ease them into wearing a leash, keep them in the harness for some time before attaching the leash. Clip the leash onto the D-ring on the middle strip and you are ready to go on walks with your slithering friends!
For more ferret ideas and to connect with the ferret community, head on over to the forum.


Pingback: Fun and Cute Ferret Clothes Ideas | DIY Ferret